
Decks need regular maintenance just like any other part of a home. However, when homeowners neglect routine deck repair or expose their decks to excessive wear and tear, it can lead to significant repairs or even an entire deck replacement.
Let’s take a look at the most common deck problems and identify when a deck can be repaired instead of having to be replaced.
Importance of Regular Maintenance
Regular deck maintenance keeps a deck looking great while ensuring its structural integrity isn’t compromised. Excessive moisture, UV exposure and everyday wear can lead to rot, warping, loose deck fastening and safety hazards.
Scheduled inspections, cleaning, sealing and minor deck repairs extend the life of the deck and reduce future expenses for homeowners. After all, regularly maintaining a deck is much more cost-efficient than paying for major repairs or replacements later on.
Common Deck Problems

Common deck problems are usually easy to spot during routine inspections and can be fixed before the deck’s aesthetic value or structural integrity becomes compromised. The most common deck problems that contractors see are:
Loose Boards
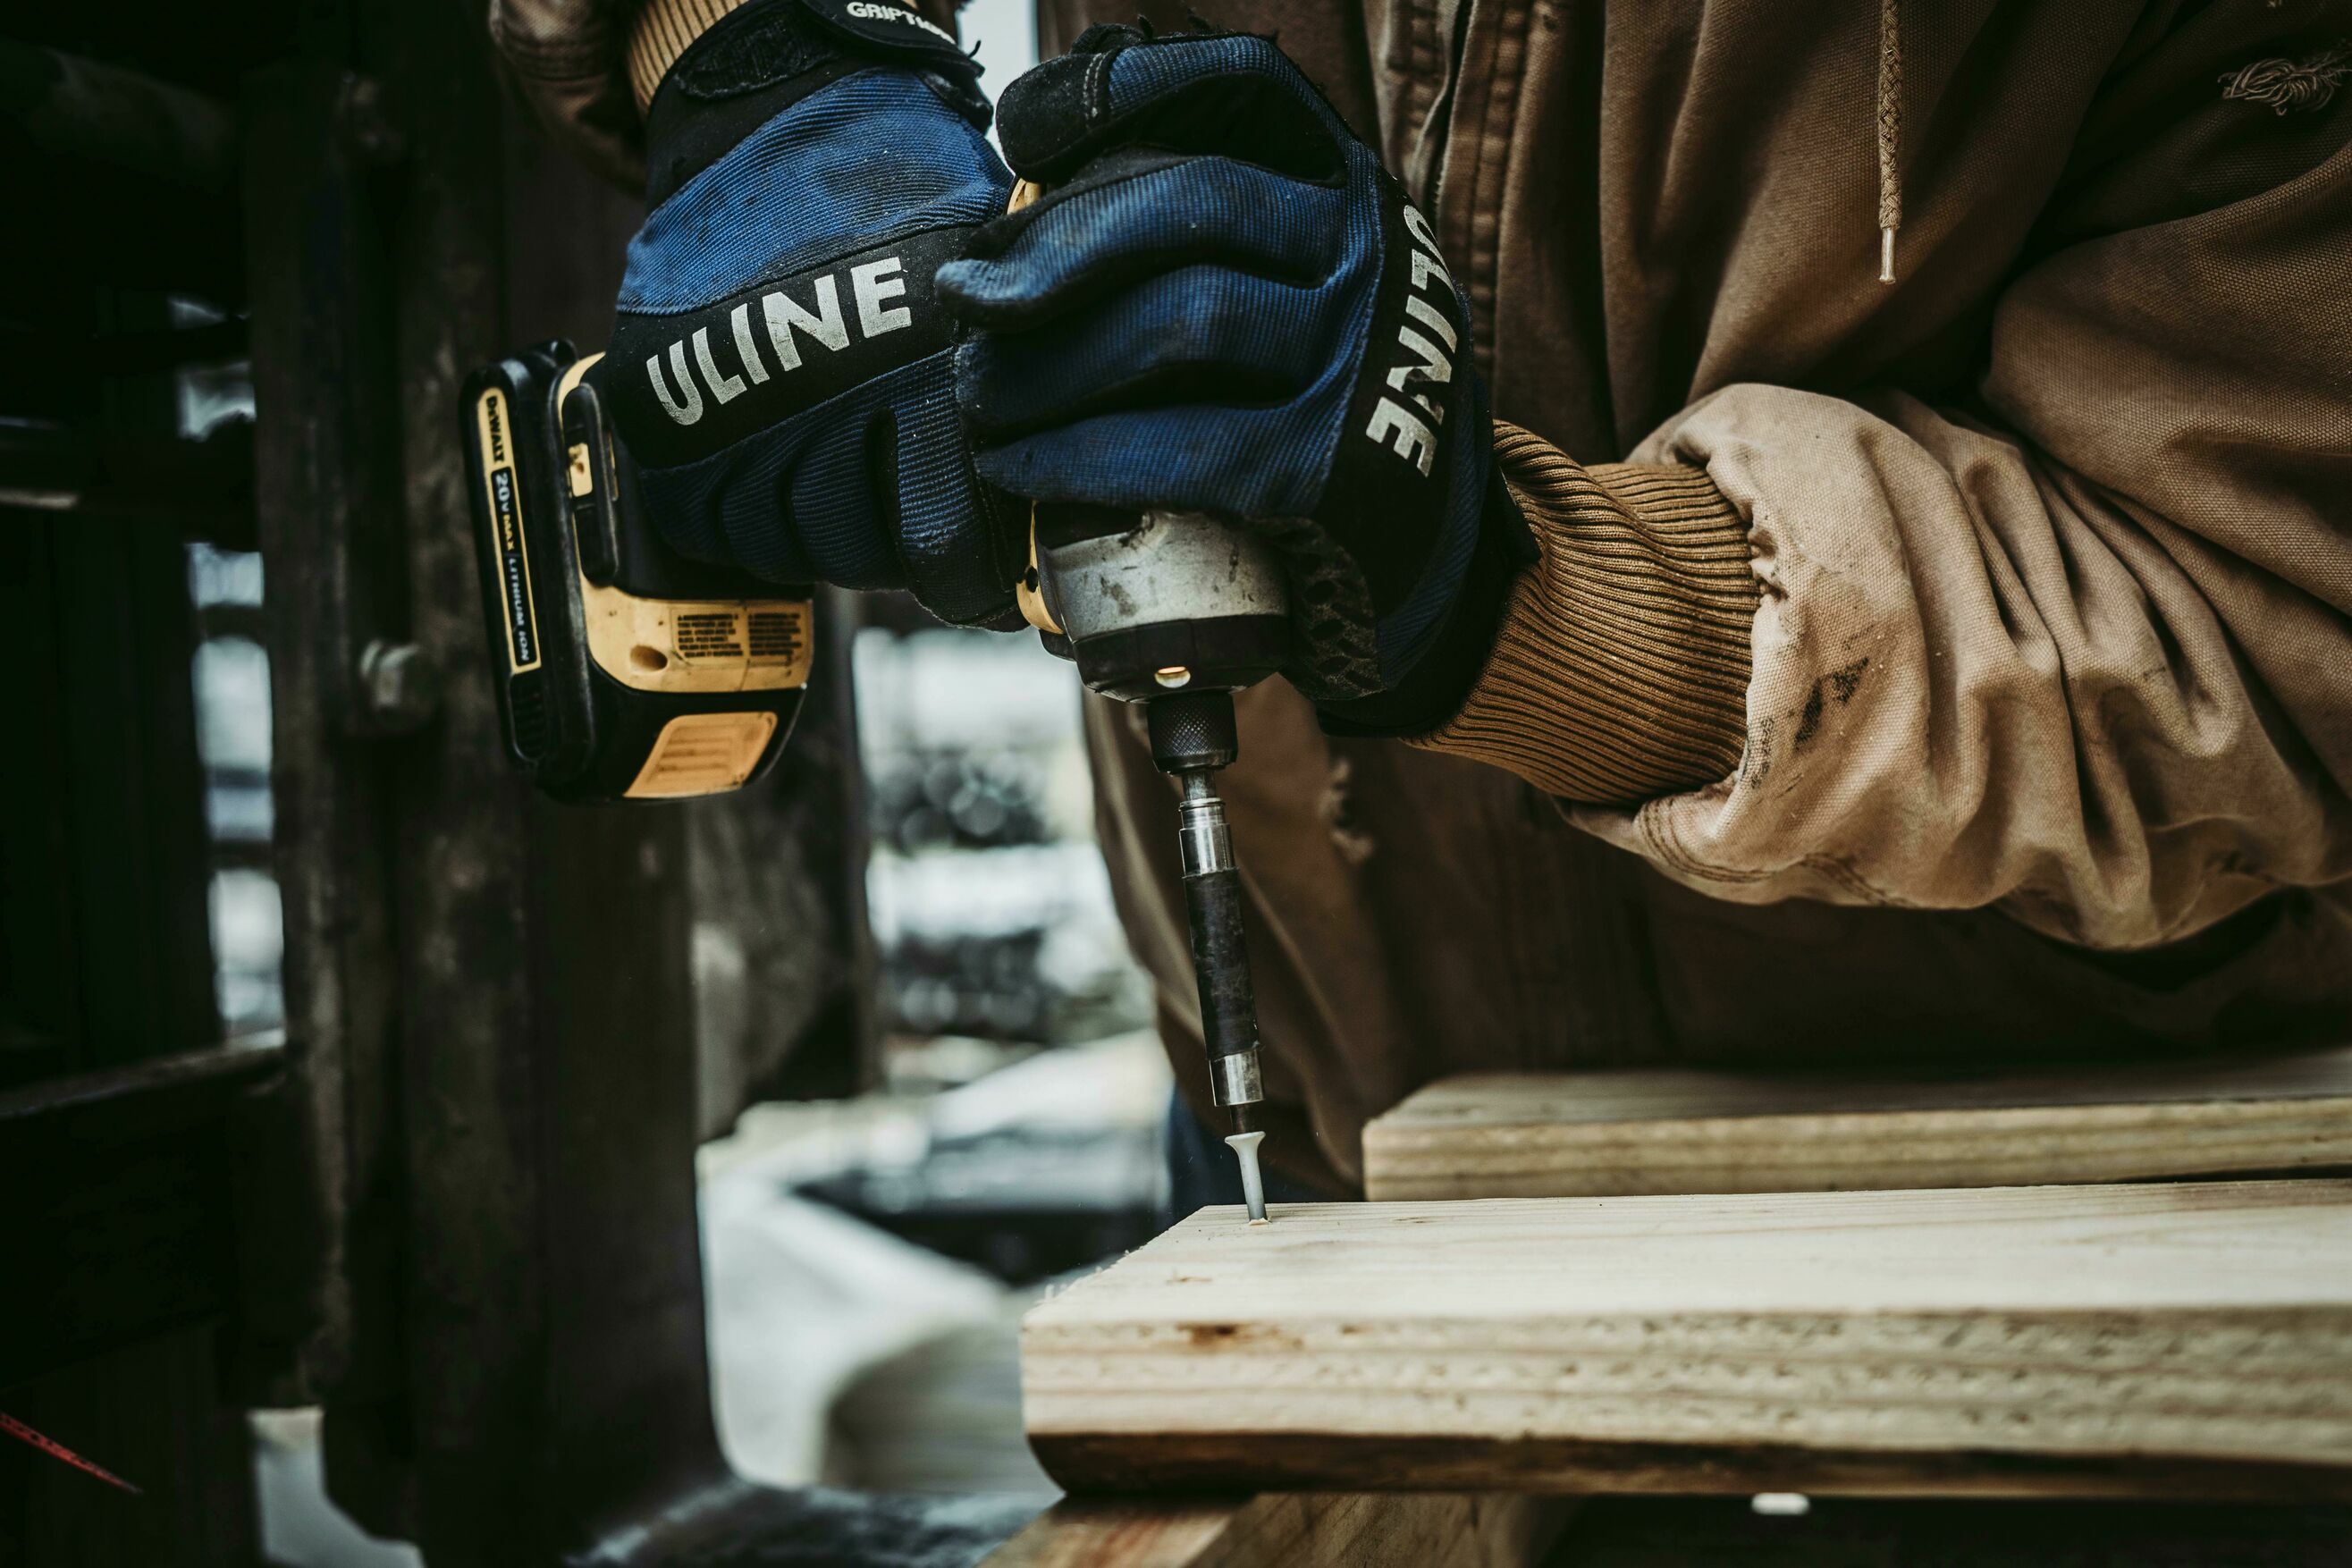
Loose boards are serious trip hazards and compromise the deck’s strength. Spotting loose deck boards starts with a simple walk test. Walk on the deck and feel for movement underfoot, listen for creaks and look for gaps at the fasteners or ends.
Visually inspect the board edges for lifting or warping, especially around high-traffic areas, stair treads and perimeter zones where boards are more exposed. Use a pry bar or flathead screwdriver to test suspected loose spots.
Check underneath the deck for loose joist hangers or failing fasteners, which can contribute to surface instability.
Causes and Fixes
Loose boards are typically caused by thermal expansion and contraction, moisture cycling, inadequate fastening or deteriorated framing. Nails can back out over time, especially in older decks. Even screws can lose grip if the wood fibers are degraded or the substructure shifts.
To fix a loose board, first determine if the board is salvageable. We will discuss how to figure this out a little bit later. If it’s in good shape, refasten it using corrosion-resistant deck screws driven into fresh locations on the joist.
Use blocking underneath if the joist is damaged or too narrow to hold a solid connection. If the boards are warped or cracked, they may need to be replaced.
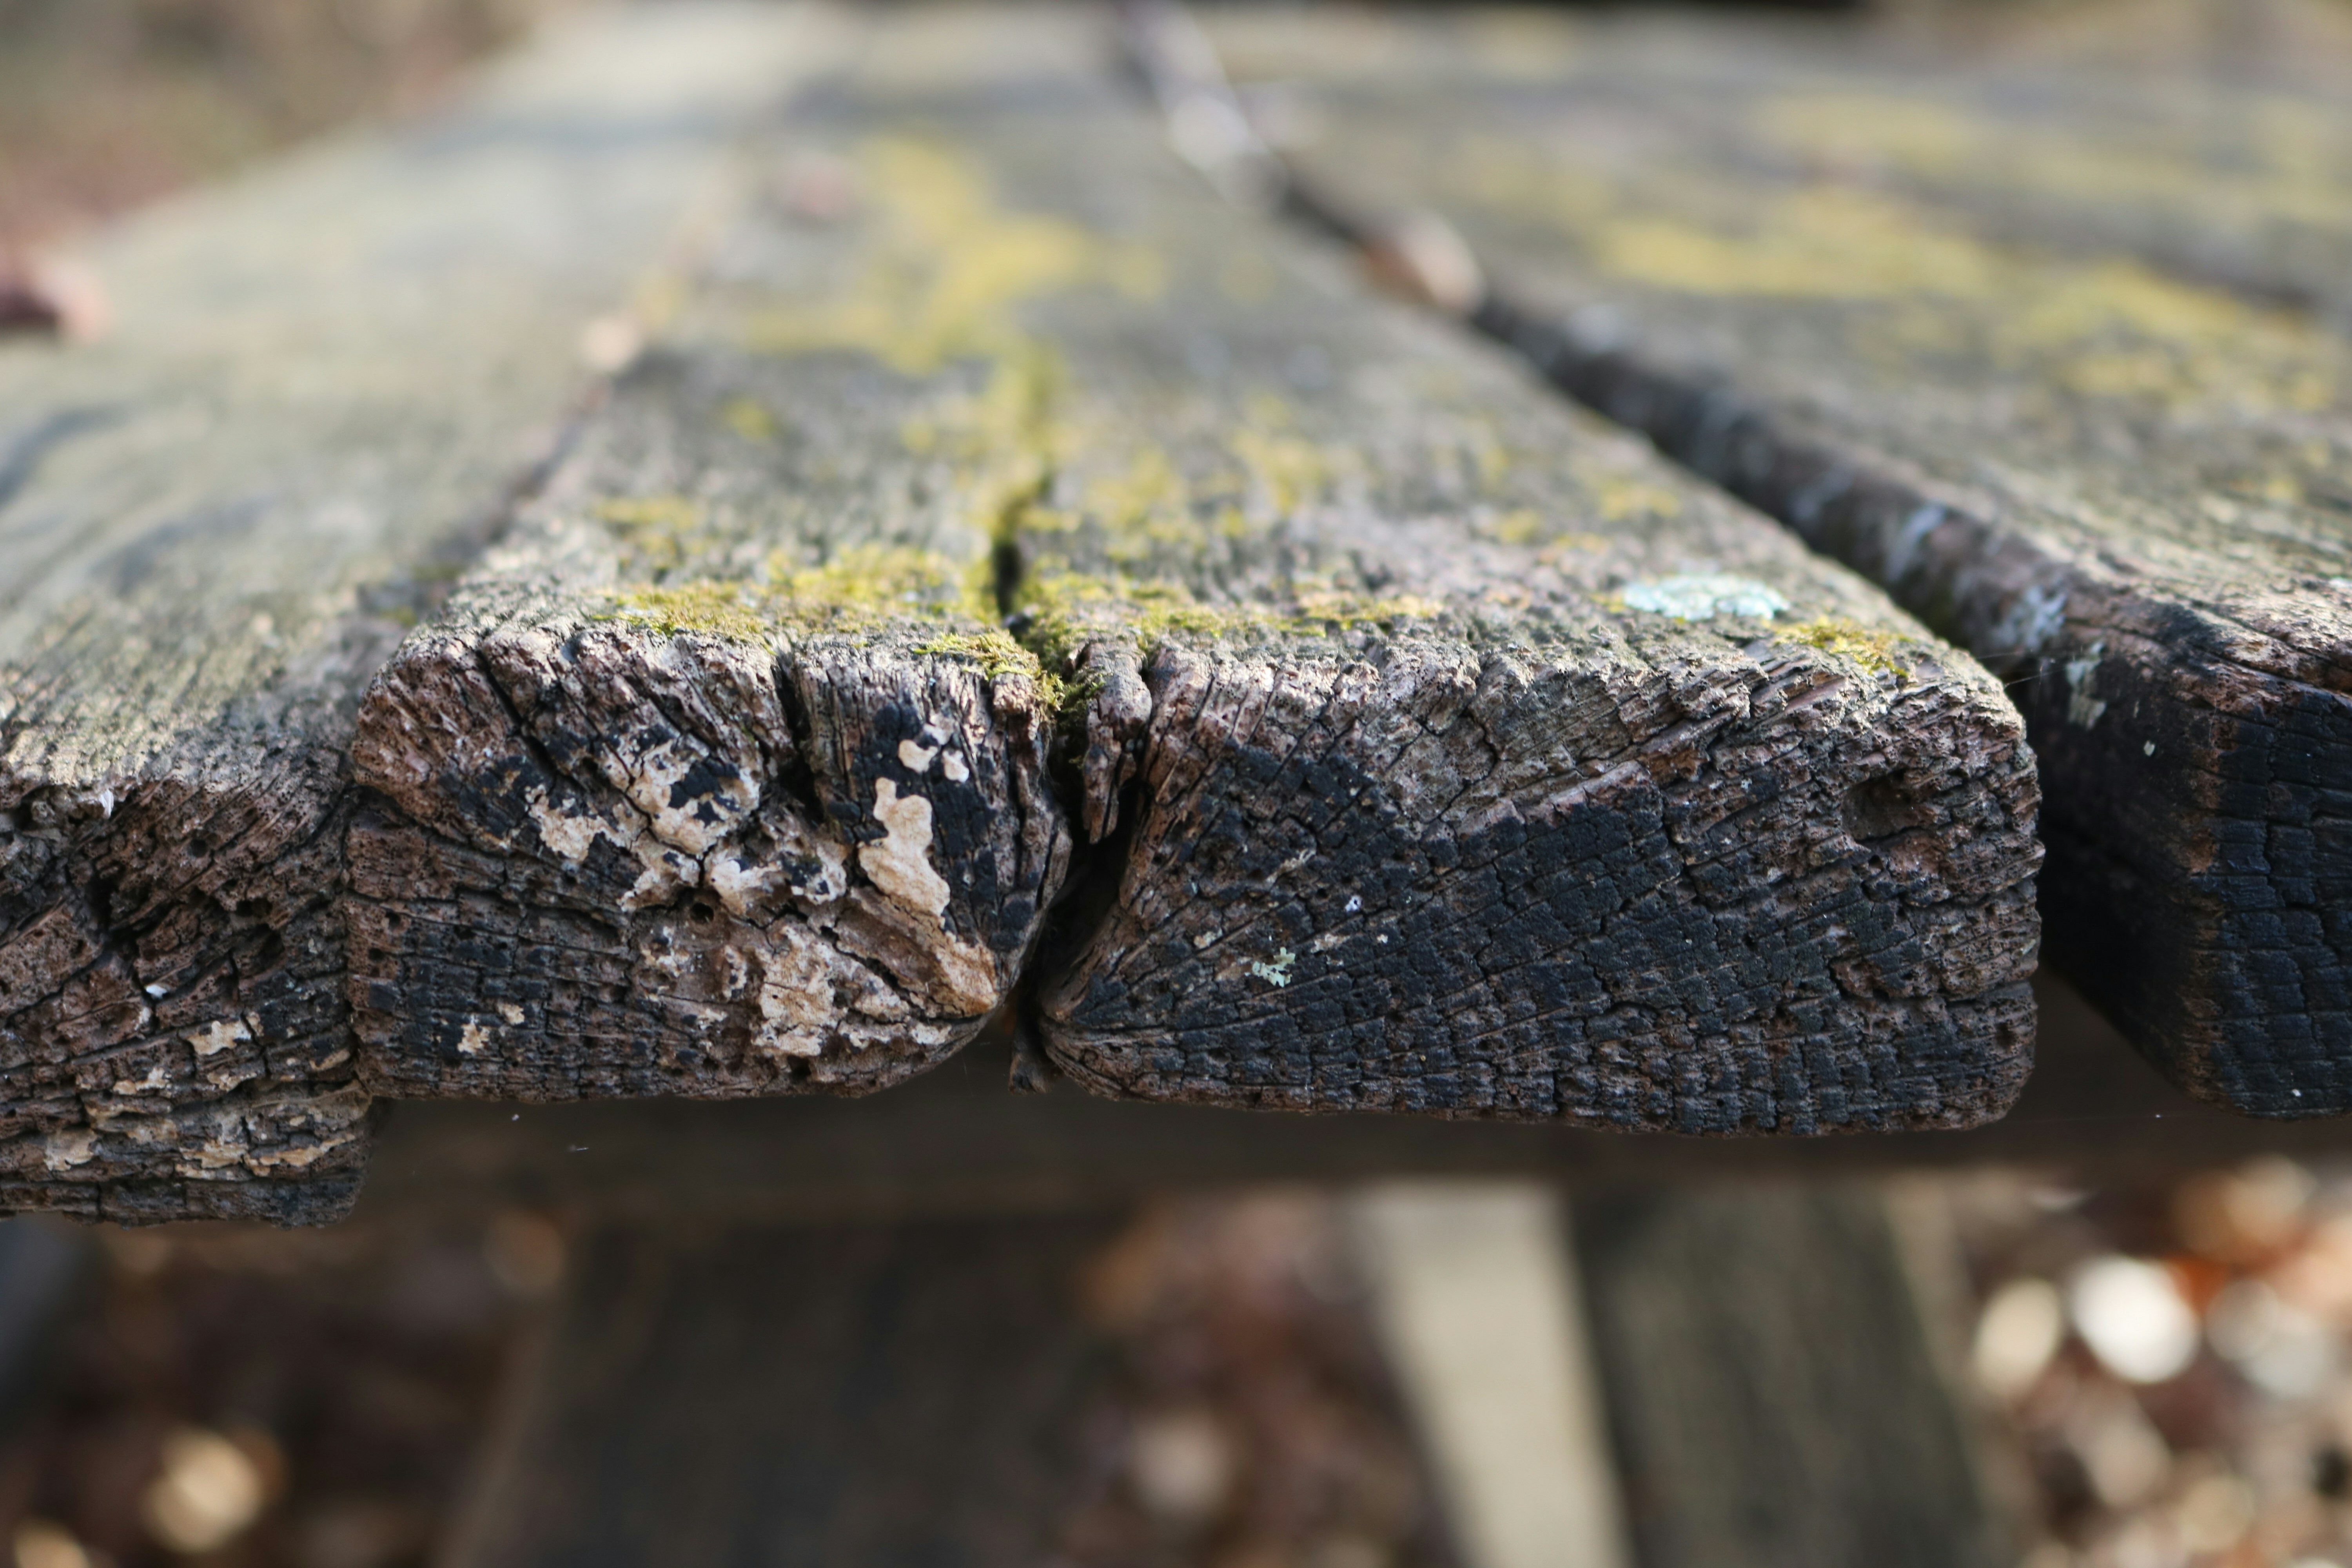
Warping and Splitting
Warping and splitting are common, especially on older or neglected decks. These problems usually stem from moisture imbalance. Damage is caused by boards expanding and contracting repeatedly with weather changes.
Improper spacing, inadequate sealing or using low-quality or uncured lumber accelerates the damage. Warped boards can create tripping hazards and compromise structural alignment.
Splitting typically occurs at the ends or around fasteners, where stress concentrates.
Before you can determine whether to repair or replace the boards, you need to assess whether the damage is isolated or symptomatic of broader moisture or design problems.
How To Identify
To identify warped or splitting deck boards, look for boards that are cupped, twisted or bowed. Often, you can tell if a board is warped by its side profile or by looking down the length of the board.
Walk the deck and feel for uneven surfaces or raised edges. Splits typically show up at the ends or near fasteners and may be visible as hairline cracks or deep fractures.
Pay special attention to high-moisture areas and spots with heavy sun exposure, where damage tends to be more severe. Use a straightedge or level if needed to confirm warping.
Repair Methods
If the deck boards can be repaired, you’ll need to start by assessing the damage. Slight warps can sometimes be corrected by re-fastening the board more securely or adding blocking underneath to reduce movement.
For cupped or twisted boards beyond repair, removal and replacement is the best option. Always use corrosion-resistant screws and secure them through fresh, solid joist areas to ensure a tight fit.
For boards with minor splits, you can apply exterior-grade wood filler or epoxy for a temporary fix, but it’s better to replace the board to ensure it remains stable over time.
When replacing boards, match the material type and spacing. Seal all sides before installation to minimize future warping and splitting.
Mold and Mildew
Mold and mildew on decks aren’t just a cosmetic issue. They’re caused by trapped moisture, especially in shaded or poorly ventilated areas. The presence of mold and mildew can indicate rot that could damage the stability of the deck. Fungi can break down wood fibers over time, making boards slippery, weak and unsafe.
On decks that have shaded or poorly ventilated areas, look for black, green or gray patches on the surface. Inspect between boards, under furniture or near planters.
Prevention and Treatment
The best way to treat mold and mildew is to deep clean the area using an oxygenated cleaner or diluted bleach solution to kill spores and remove buildup, especially in cracks and between boards. Gentle power washing can also remove buildup.
Once the area has been cleaned and dried, apply a high-quality, mold-resistant sealer or stain to block future growth.
To help prevent mold and mildew, make sure there is a proper runoff channel for water and adequate board spacing for good airflow. Recommend regular cleaning and maintenance to the homeowner and make sure all the deck boards are sealed.
Tools and Materials Needed
Your tool kit for deck repairs should have the supplies necessary for structural fixes, surface repairs and finishing work.
Essential Tools
Every professional doing deck repairs should keep a well-stocked truck. Essential tools include a circular saw, impact driver, drill, pry bar, hammer, speed square and tape measure.
Keep a multi-tool or oscillating saw for tight cuts and detailed work, along with a level, chalk line and utility knife. A fully equipped truck means faster fixes, fewer delays and more professional results.
Recommended Materials
For efficient deck repairs, your truck should be stocked with key materials that cover the most common issues.
Carry a variety of corrosion-resistant deck fastening screws in multiple lengths, joist hangers, structural connectors and galvanized nails. Include extra decking boards like pressure-treated, cedar or composite in standard sizes, as well as shims and blocking material.
Deck board spacers, wood glue, exterior-grade wood filler and construction adhesive are also must-haves. Additionally, be sure to have hand sealants and waterproofing products, including clear or tinted deck sealers and mold and mildew cleaners.
Having these materials on hand means you can handle repairs on the spot.
Step-by-Step Deck Repair Process
In most cases, deck repairs aren’t complicated. If you follow these steps, you can streamline the process of checking for damage and executing any necessary repairs.
Assessing the Damage
Start with a systematic inspection of both the deck surface and the substructure. Walk the deck to feel for soft spots, movement or loose boards. Check for rot, splitting, weak deck fastening or warping. Pay close attention to the areas around fasteners, stair connections and rail posts.
Look underneath the deck to inspect joists, beams, ledger boards and hardware for signs of water damage, rust or structural compromise. Probe any suspicious areas with an awl or screwdriver to test for rot.
Executing Repairs
Once you have assessed the condition of the deck and determined whether the damage is cosmetic or structural (or both), you can begin the repairs.
Fixing Loose Boards
To fix loose deck boards that are still in good shape, remove any nails or damaged screws and re-secure them using corrosion-resistant deck screws in a new location to get a better hold.
If the joist is compromised, add blocking or sister a new piece alongside to provide a solid deck fastening point. For boards that lift or bounce, use additional screws to anchor the center span. Always check nearby boards as loose boards often come in clusters.
Treating Mold
To treat mold on a deck, clear any debris, then use a stiff brush or broom to remove surface buildup. Apply a commercial-grade oxygenated deck cleaner that’s safe for the type of deck being cleaned or use a diluted bleach solution.
Scrub thoroughly and let the solution sit as directed before rinsing with a hose or a pressure washer on a low setting. Once the wood is dry, inspect it for any soft or rotted areas that may need repair.
If there are no boards that need replacing or fixing, finish the treatment by applying a mold-resistant sealer to help prevent future growth.
Find The Right Solutions For Deck Repairs And Builds With FastenMaster
Whether it’s a repair job or a brand new deck build, selecting the right fasteners can make or break the design results. When you’re searching for fasteners that you can rely on time and time again, look no further than FastenMaster.
At FastenMaster, we have deck fastening solutions that get the job done right the first time and make repairs a breeze. With products that prioritize speed, strength, ease and safety, you can tackle projects with confidence.
Check out FastenMaster’s deck solutions to find the latest innovative fastener systems for every deck build or repair project.