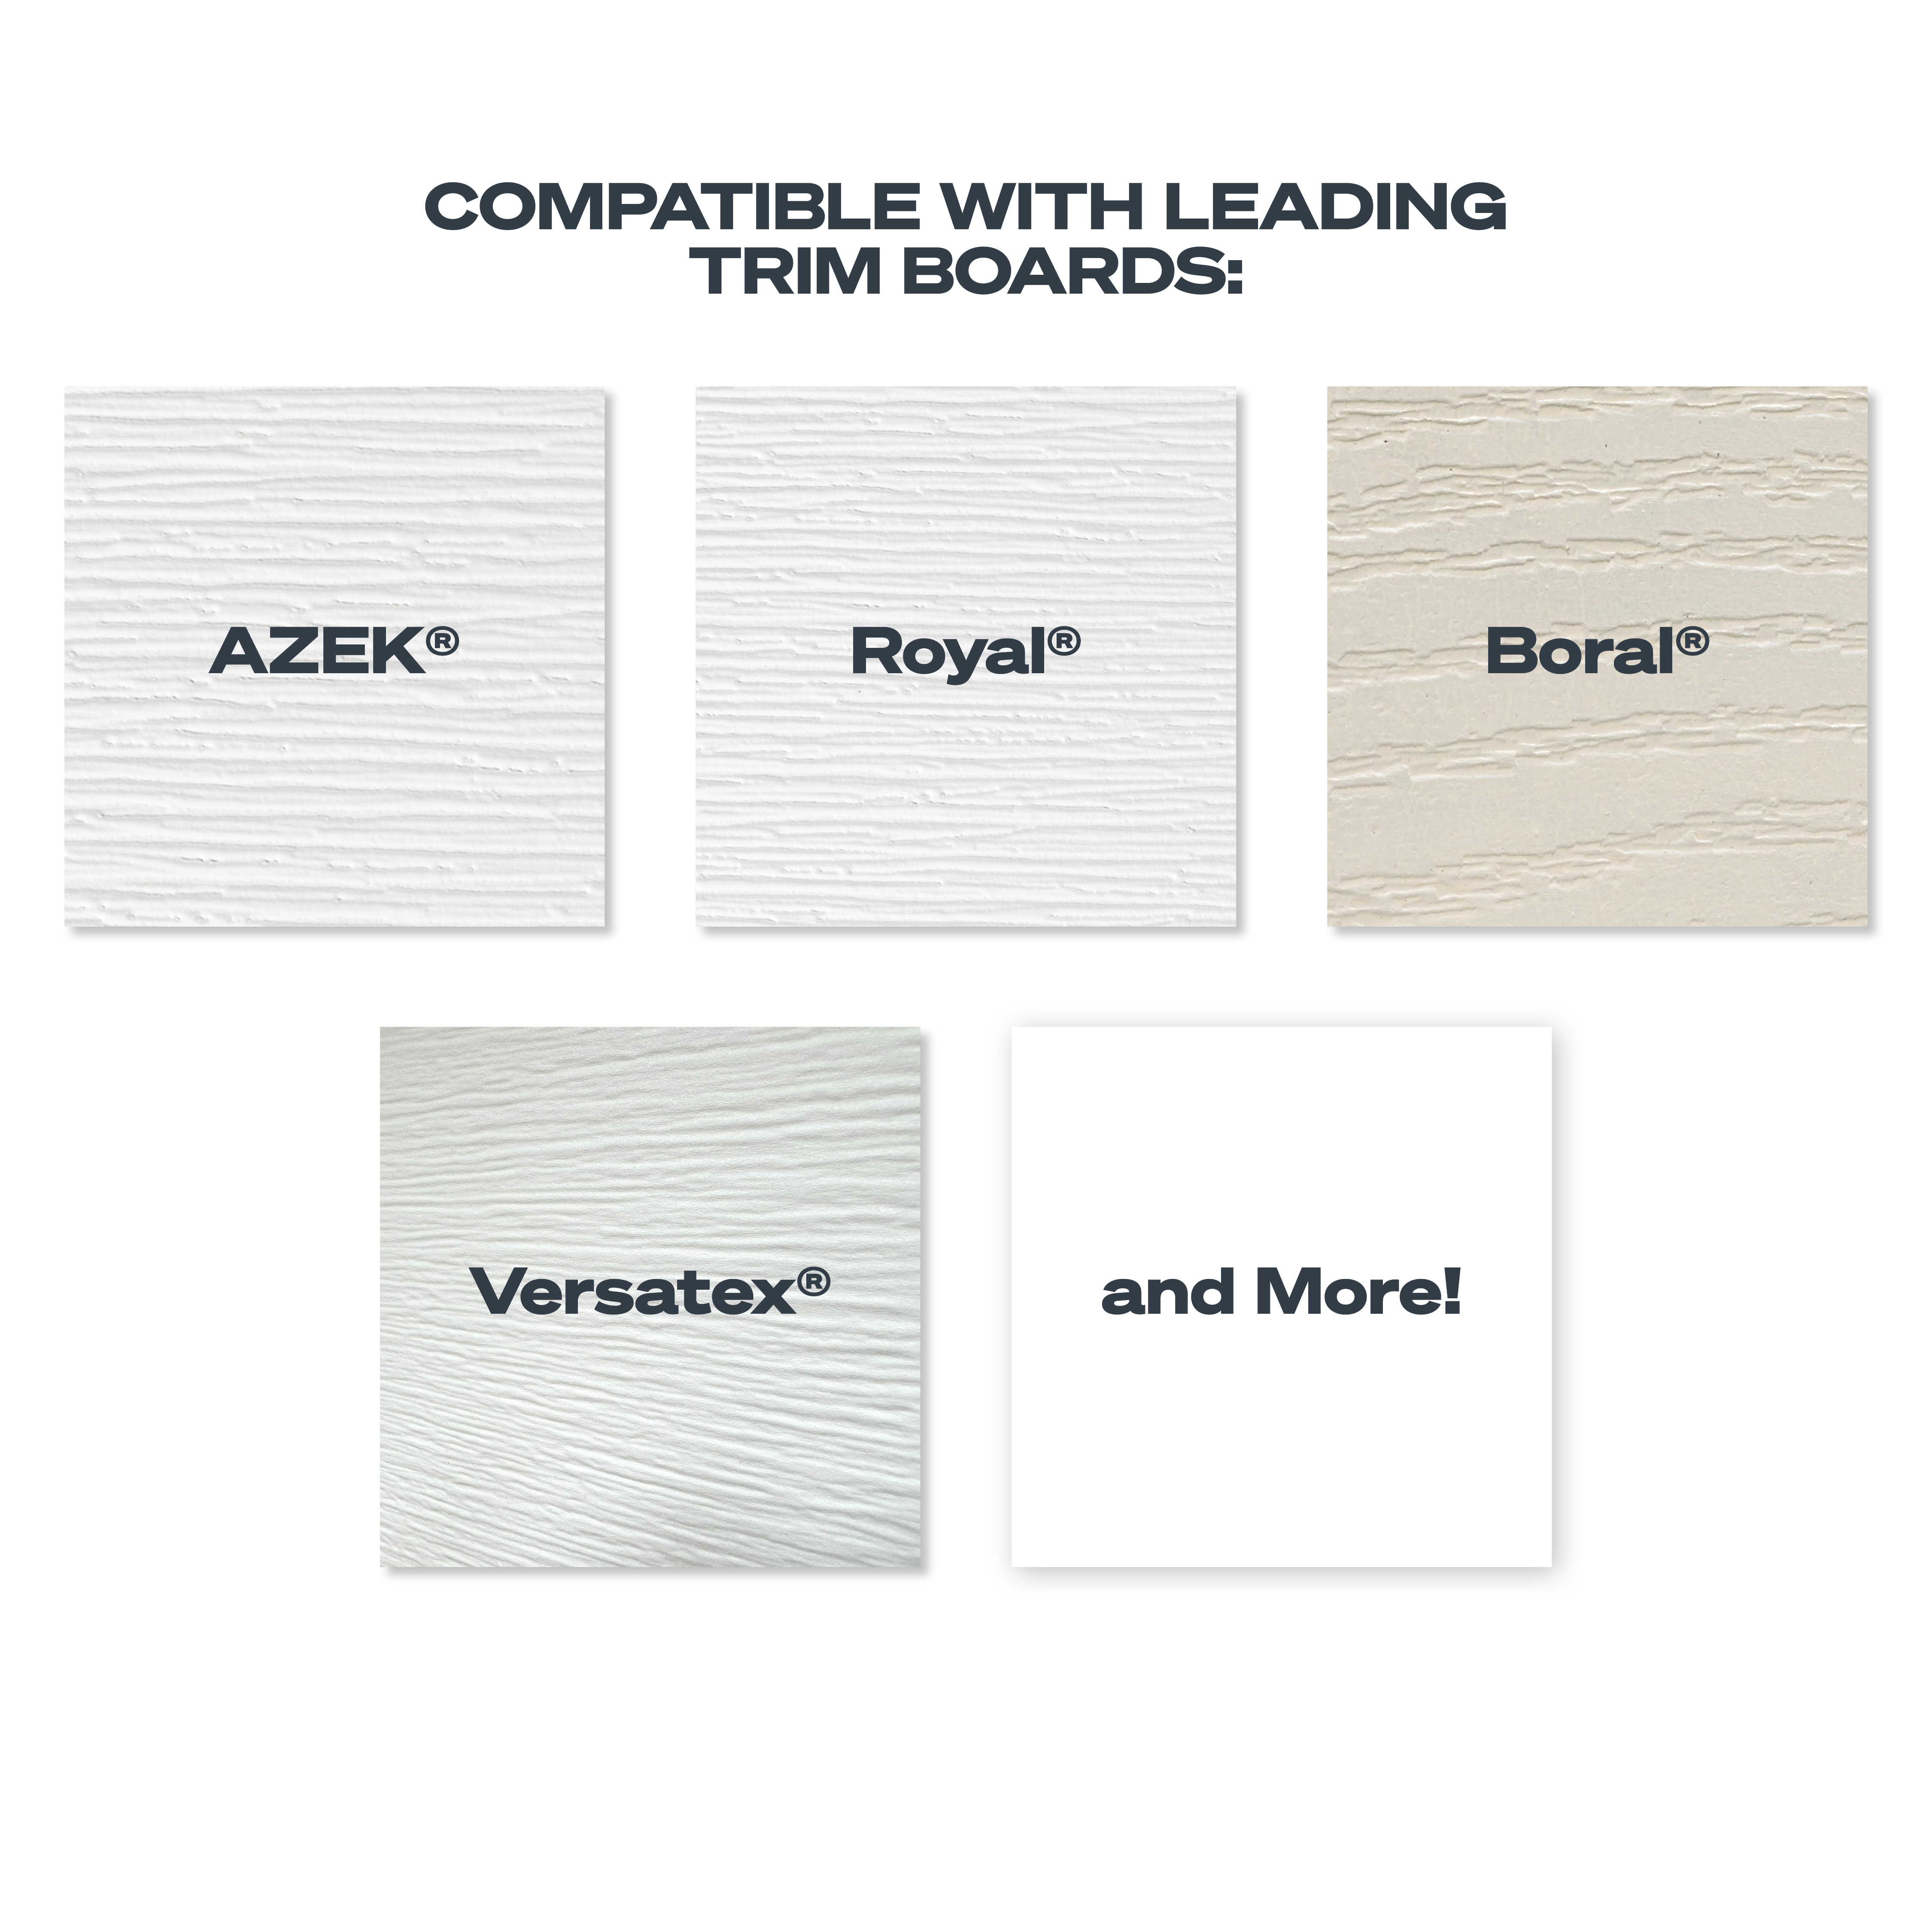
Perfect Match, Clean Finish
Cortex plugs are made from the same material as market-leading trim boards, creating a 100% perfect match every time.
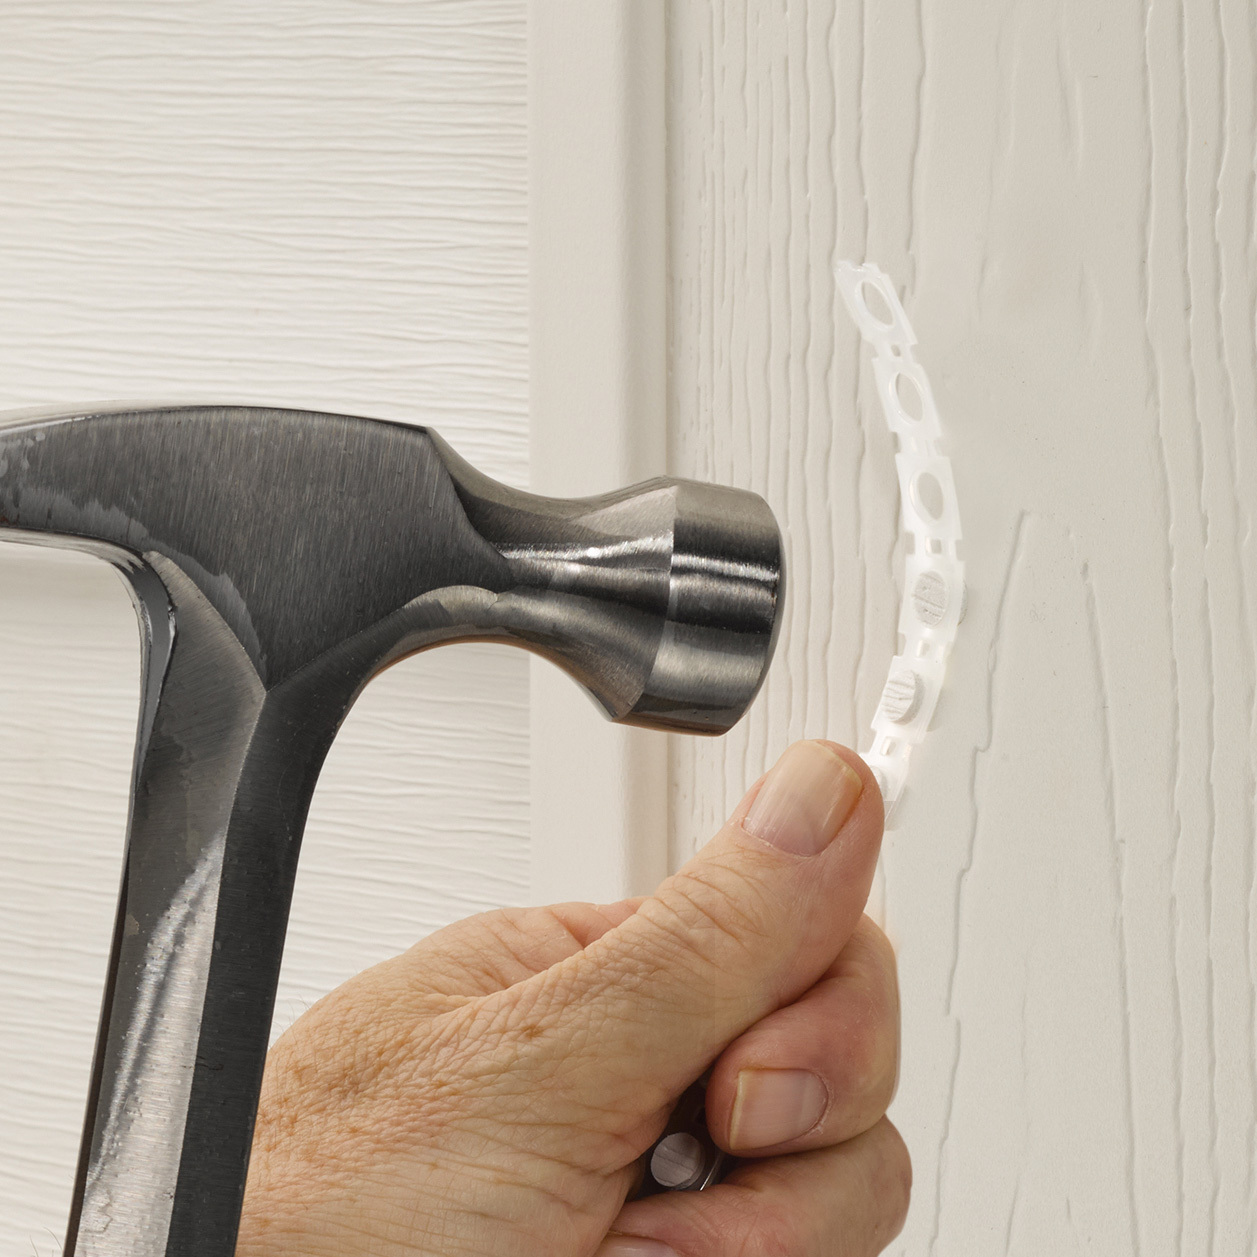
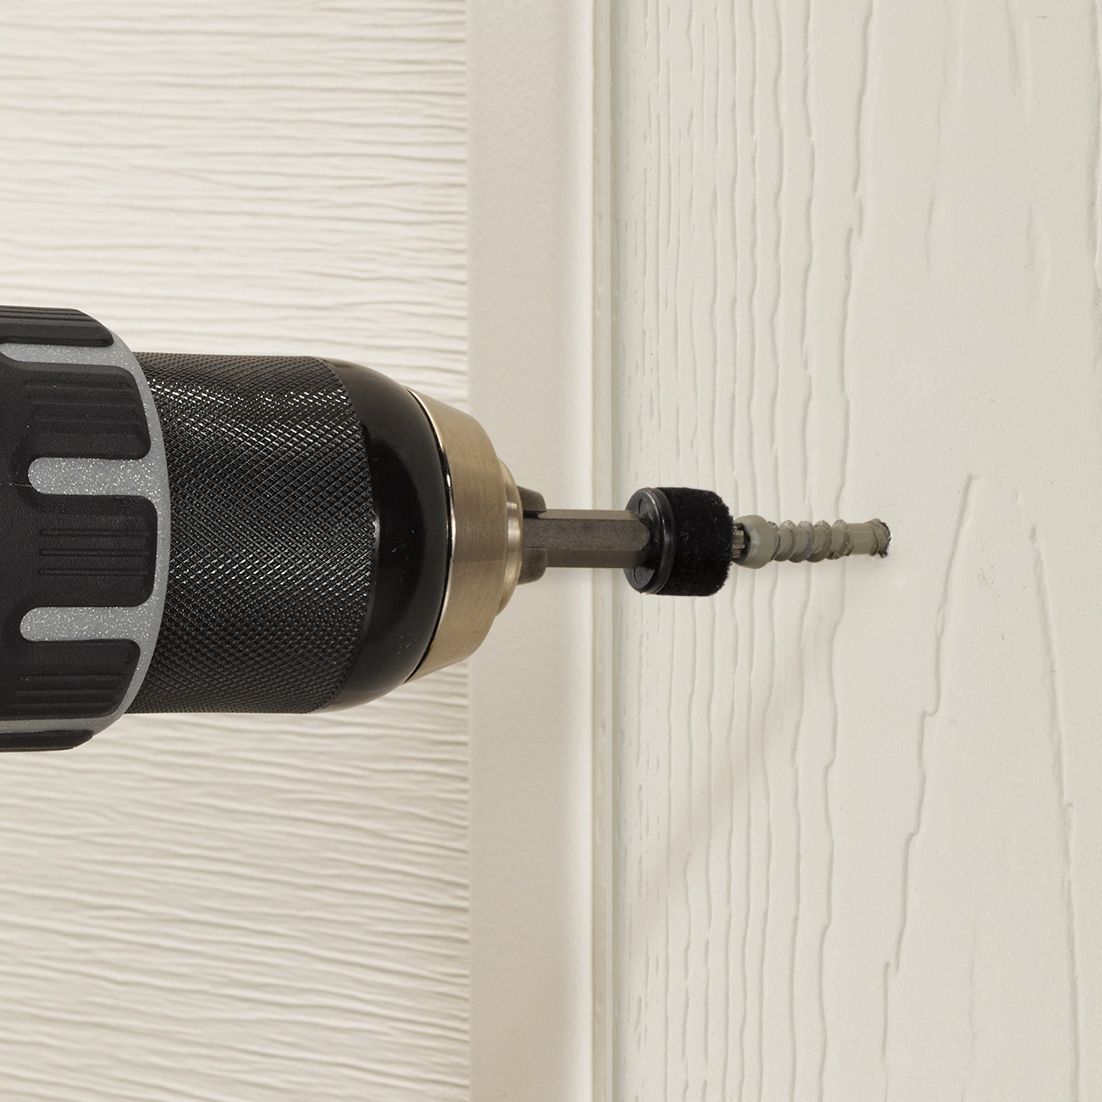
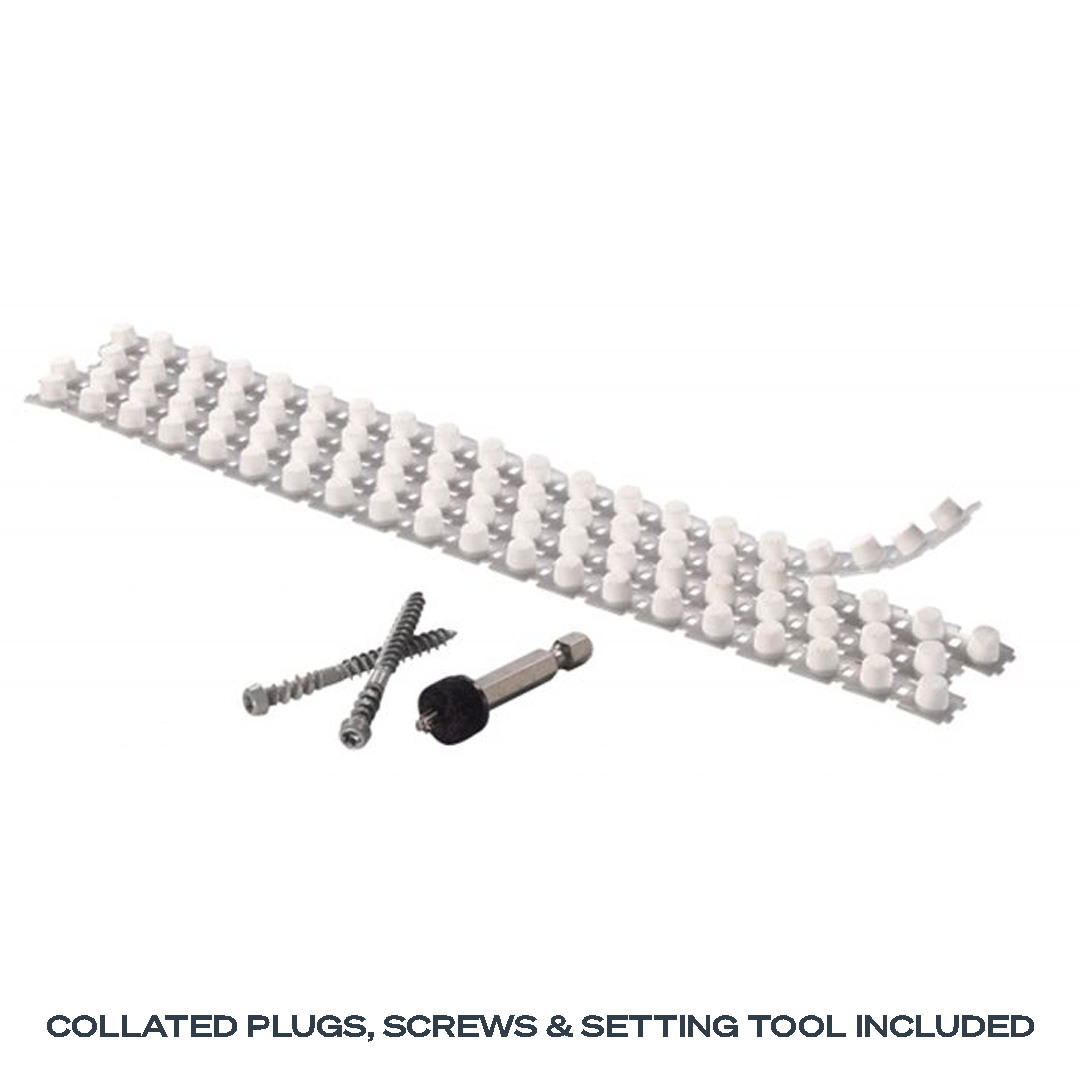


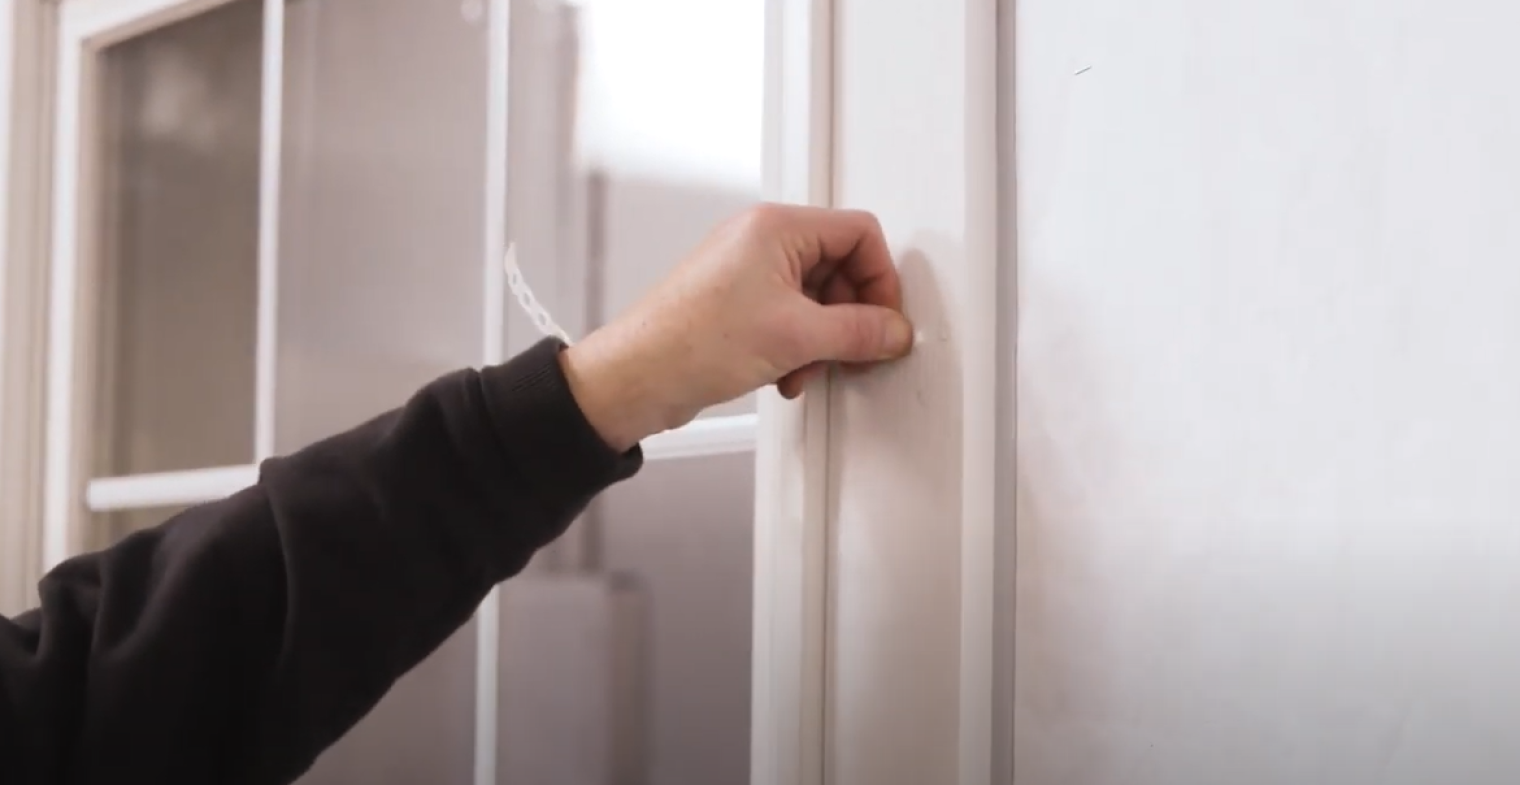
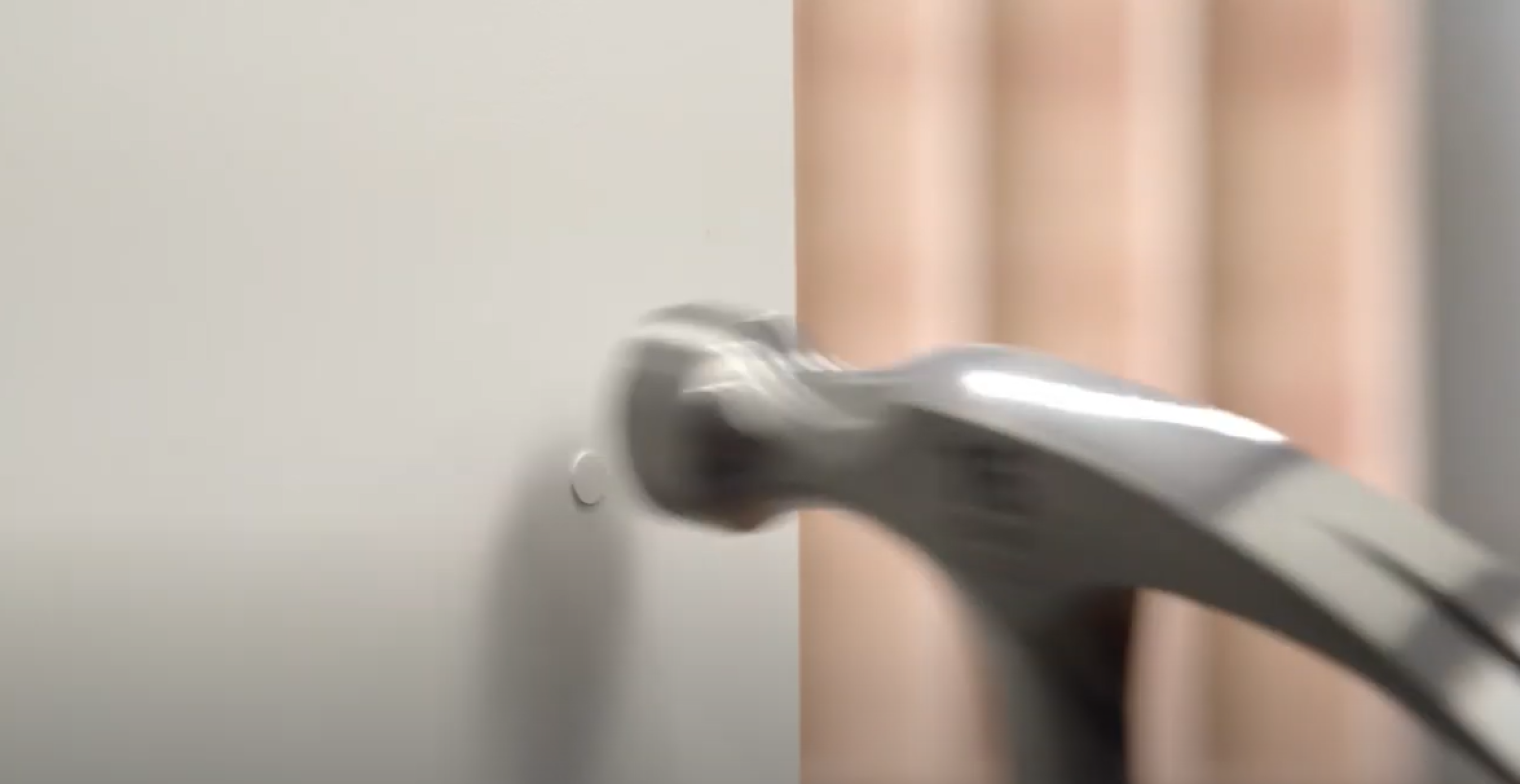
The FastenMaster Cortex Hidden Fastening System is the fastest, easiest way to hide fastener heads when installing PVC Trim.
Cortex plugs are made from the same material as market-leading trim boards, creating a 100% perfect match every time.
Cortex plugs come on a collated strip with pre-aligned grains, so there's no more need to fumble around with loose plugs.
TORX® ttap® provides a superior bit engagement for a stable, wobble-free installation experience.

The FastenMaster Cortex Hidden Fastening System is the fastest, easiest way to hide fastener heads when installing PVC Trim.


Learn more about product specifications. Explore our products resources library.
| Only FastenMaster brand Cortex listed. Also available for AZEK®. Contact the board manufacturer or your Local Dealer for more information. | |||||
| Manufacturer | Color | Length | Packaging | Collated vs. Loose | SKU |
| Royal | Chestnut | 2 3/4" | 250 LN FT (375 screws / 400 plugs) | Collated | FMCTXTCL234-C2CN |
| Royal | Cotton | 2 3/4" | 250 LN FT (375 screws / 400 plugs) | Collated | FMCTXTCL234-C2CT |
| Royal | Frost | 2 3/4" | 250 LN FT (375 screws / 400 plugs) | Collated | FMCTXTCL234-C2FT2 |
| Royal | Grain | 2 3/4" | 250 LN FT (375 screws / 400 plugs) | Collated | FMCTXTCL234-RY2GN |
| Royal | Grain | 2 3/4" | 750 LN FT (1125 screws / 1200 plugs) | Collated | FMCTXTCL234-RY7GN |
| Royal | Grain | 2" | 250 LN FT (375 screws / 400 plugs) | Collated | FMCTXTCL-RY250GN |
| Royal | Grain | 2" | 750 LN FT (1125 screws / 1200 plugs) | Collated | FMCTXTCL-RY750GN |
| Royal | Grove | 2 3/4" | 250 LN FT (375 screws / 400 plugs) | Collated | FMCTXTCL234-C2GV |
| Royal | Latte | 2 3/4" | 250 LN FT (375 screws / 400 plugs) | Collated | FMCTXTCL234-C2LT |
| Royal | Oceana | 2 3/4" | 250 LN FT (375 screws / 400 plugs | Collated | FMCTXTCL234-C2NA2 |
| Royal | Pearl | 2 3/4" | 250 LN FT (375 screws / 400 plugs) | Collated | FMCTXTCL234-C2PL |
| Royal | Pine Brook | 2 3/4" | 250 LN FT (375 screws / 400 plugs) | Collated | FMCTXTCL234-C2PB2 |
| Royal | River Rock | 2 3/4" | 250 LN FT (375 screws / 400 plugs) | Collated | FMCTXTCL234-C2RR |
| Royal | Shale | 2 3/4" | 250 LN FT (375 screws / 400 plugs) | Collated | FMCTXTCL234-C2SL |
| Royal | Smooth | 2 3/4" | 250 LN FT (375 screws / 400 plugs) | Collated | FMCTXTCL234-RY2SM |
| Royal | Smooth | 2 3/4" | 750 LN FT (1125 screws / 1200 plugs) | Collated | FMCTXTCL234-RY7SM |
| Royal | Smooth | 2" | 250 LN FT (375 screws / 400 plugs) | Collated | FMCTXTCL-RY250SM |
| Royal | Smooth | 2" | 750 LN FT (1125 screws / 1200 plugs) | Collated | FMCTXTCL-RY750SM |
| Royal | Willow | 2 3/4" | 250 LN FT (375 screws / 400 plugs) | Collated | FMCTXTCL234-C2WL |
| Royal | Wrought Iron | 2 3/4" | 250 LN FT (375 screws / 400 plugs) | Collated | FMCTXTCL234-C2WR |
| Versatex | Smooth | 2 3/4" | 250 LN FT (375 screws / 400 plugs) | Collated | FMCTXTCL234-VT2SM |
| Versatex | Smooth | 2 3/4" | 750 LN FT (1125 screws / 1200 plugs) | Collated | FMCTXTCL234-VT7SM |
| Versatex | Smooth | 2" | 250 LN FT (375 screws / 400 plugs) | Collated | FMCTXTCL-VT250SM |
| Versatex | Smooth | 2" | 750 LN FT (1125 screws / 1200 plugs) | Collated | FMCTXTCL-VT750SM |
| Versatex | Timber Ridge | 2 3/4" | 250 LN FT (375 screws / 400 plugs) | Collated | FMCTXTCL234-VT2TR |
| Versatex | Timber Ridge | 2 3/4" | 750 LN FT (1125 screws / 1200 plugs) | Collated | FMCTXTCL234-VT7TR |
| Versatex | Timber Ridge | 2" | 250 LN FT (375 screws / 400 plugs) | Collated | FMCTXTCL-VT250TR |
| Versatex | Timber Ridge | 2" | 750 LN FT (1125 screws / 1200 plugs) | Collated | FMCTXTCL-VT750TR |
| Boral | Grain | 2 3/4" | 250 LF (375 screws / 400 plugs) | Loose | FMCTXT234-BR2TEGN |
| Boral | Smooth | 2 3/4" | 250 LF (375 screws / 400 loose plugs) | Loose | FMCTXT234-BR2TESM |
| Boral | Grain | 2 3/4" | 50 LF (75 screws / 100 loose plugs) | Loose | FMCTXT234-BR50TEGN |
| Boral | Smooth | 2 3/4" | 50 LF (75 screws / 100 loose plugs) | Loose | FMCTXT234-BR50TESM |
| Boral | Grain | 2 3/4" | 750 LF (1125 screws / 1200 loose plugs) | Loose | FMCTXT234-BR7TEGN |
| Boral | Smooth | 2 3/4" | 750 LF (1125 screws / 1200 loose plugs) | Loose | FMCTXT234-BR7TESM |
| Boral | Grain | 2" | 250 LF (375 screws / 400 loose plugs) | Loose | FMCTXT-BR250TEGN |
| Boral | Smooth | 2" | 250 LF (375 screws / 400 loose plugs) | Loose | FMCTXT-BR250TESM |
| Boral | Grain | 2" | 50 LF (75 screws / 100 loose plugs) | Loose | FMCTXT-BR50TEGN |
| Boral | Smooth | 2" | 50 LF (75 screws / 100 loose plugs) | Loose | FMCTXT-BR50TESM |
| Boral | Grain | 2" | 750 LF (1125 screws / 1200 loose plugs) | Loose | FMCTXT-BR750TEGN |
| Boral | Smooth | 2" | 750 LF (1125 screws / 1200 loose plugs) | Loose | FMCTXT-BR750TESM |
| Royal | Grain | 2 3/4" | 50 LF (75 screws / 100 plugs) | Loose | FMCTXT234-RY50GN |
| Royal | Grain | 2" | 50 LF (75 screws / 100 plugs) | Loose | FMCTXT-RY50GN |
| Royal | Smooth | 2 3/4" | 50 LF (75 screws / 100 plugs) | Loose | FMCTXT234-RY50SM |
| Royal | Smooth | 2" | 50 LF (75 screws / 100 plugs) | Loose | FMCTXT-RY50SM |
| Versatex | Traditional | 2 3/4" | 250 LF (375 screws / 400 plugs) | Loose | FMCTXT234-VT250TR |
| Versatex | Traditional | 2 3/4" | 50 LF (75 screws / 100 plugs) | Loose | FMCTXT234-VT50TR |
| Versatex | Traditional | 2 3/4" | 750 LF (1125 screws / 1200 plugs) | Loose | FMCTXT234-VT750TR |
| Versatex | Traditional | 2" | 250 LF (375 screws / 400 plugs) | Loose | FMCTXT-VT250TR |
| Versatex | Traditional | 2" | 50 LF (75 screws / 100 plugs) | Loose | FMCTXT-VT50TR |
| Versatex | Traditional | 2" | 750 LF (1125 screws / 1200 plugs) | Loose | FMCTXT-VT750TR |
| Versatex | Smooth | 2 3/4" | 250 LF (375 screws / 400 plugs) | Loose | FMCTXT234-VT250SM |
| Versatex | Smooth | 2 3/4" | 50 LF (75 screws / 100 plugs) | Loose | FMCTXT234-VT50SM |
| Versatex | Smooth | 2 3/4" | 750 LF (1125 screws / 1200 plugs) | Loose | FMCTXT234-VT750SM |
| Versatex | Smooth | 2" | 250 LF (375 screws / 400 plugs) | Loose | FMCTXT-VT250SM |
| Versatex | Smooth | 2" | 50 LF (75 screws / 100 plugs) | Loose | FMCTXT-VT50SM |
| Versatex | Smooth | 2" | 750 LF (1125 screws / 1200 plugs) | Loose | FMCTXT-VT750SM |